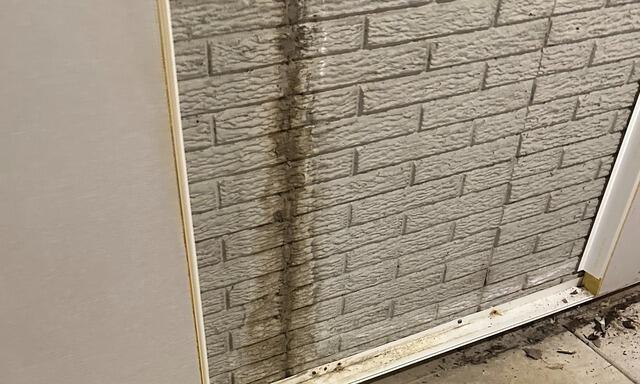
Water Stains
This crack has leaked for awhile and needed to be sealed up to prevent further damage to the basement.
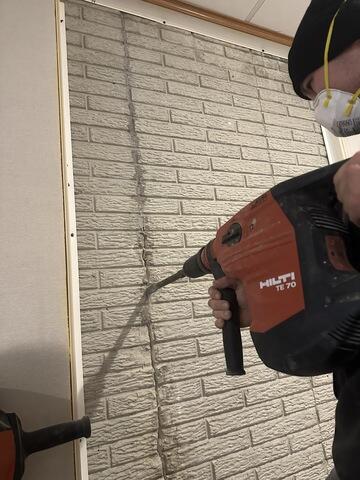
Opening the Wall Crack
Opening up the crack in the wall allows the FlexiSpan sealant to adhere better.
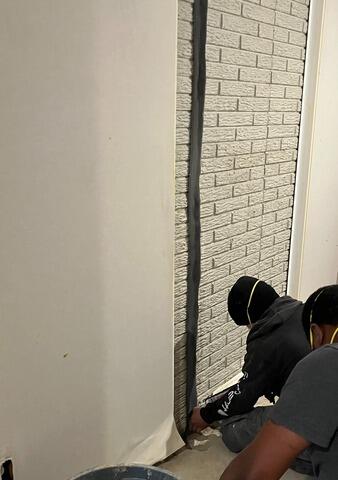
Foam-Lined Channel
Connor and Mike are installing the foam-lined channel so that water leakage can exit to the drainage system that is installed on the bottom of the wall.
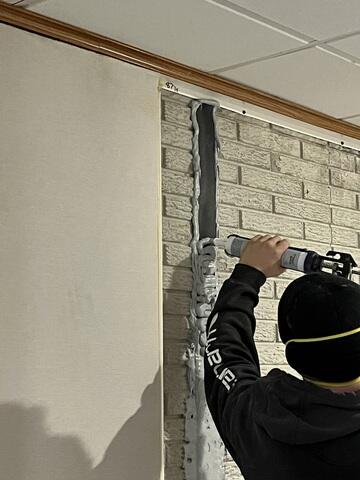
Applying the Flexible Sealant
Connor works on applying the impermeable membrane so that water can move through the crack and into the drainage system.
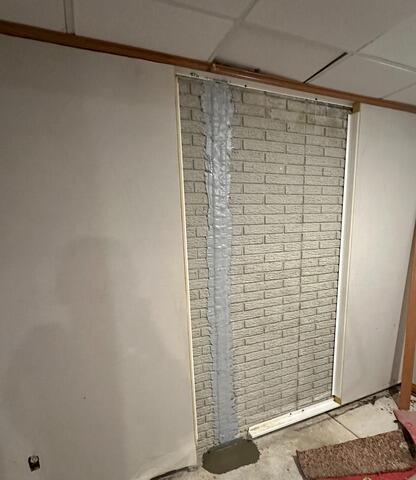
FlexiSpan Installed
This is the final product. FlexiSpan will now prevent water from damaging the foundation and safely direct it to the drainage system.